# Using Swift to Build Native Modules in Titanium
💡 Hint
This document describes features available in Titanium SDK 8.0.0+.
As a developer of native cross-platform apps, you may run into situations where you want to use a native API that is not exposed in Titanium. Luckily, there are two options available to integrate these functionalities into your app seamlessly:
Hyperloop: Allows you to extend your existing JavaScript-based app with native code (iOS, Android & Windows) that is also available through JavaScript by generating native code from it. Learn more here (opens new window)!
Native Modules: Allows you to write a native library (Obj-C for iOS, Java for Android & C++ for Windows) that can be packaged as a module dependency to your project.
The choice of which of both solution should be used is always up to the developer and depends on the project-based needs. In general, both solutions are high performant and pluggable. If you are more into JavaScript, Hyperloop and the native docs (e.g. from Apple, Google and Microsoft) will help you getting started quickly. If you need a module for a project that uses low-level code (like C or C++), native modules will be the better choice because of the easier access to their API's.
# History
When it comes to iOS, Titanium always relied on Objective-C based native modules. Over time, Swift was introduced and became more and more stable over the last years. That's why in Titanium SDK 8+, we moved our iOS core-system to an own framework, which allows developers like you to write full-featured and pure Swift frameworks. It does not only allow you to use external Swift libraries (like Alamofire or IGListKit), but also to write the modules themselves in Swift as well.
# Getting Started
To get started with Swift modules in Titanium, simply create a new module project from the CLI:
ti create -p ios -t timodule
It will prompt you to select a name, a module-identifier, project location and finally, the code-base. In Titanium 8+, you can select between Objective-C and Swift based modules. We are not planning to deprecate Objective-C anytime soon and leave it up the developer to select the best fit. Both module code-bases can be used together in one project without issues. And that's it! The generated module contains a <ModuleID>Module.swift and a <ModuleID>ExampleProxy.swift that are the 1:1 pardons of their Objective-C siblings. All required Titanium libraries are already included and you are ready to go.
# Writing Swift API's for Titanium
When it comes to method naming conventions, the concepts that you may be used to are the same as before. If you are completely new to native Titanium modules, we recommend you to read the iOS Module Quick Start guide before. This guide references some examples from the titanium-swift-module-example (opens new window) repository that you can clone and try yourself.
Important to know is that every Swift-based method that you want to call from your Titanium application needs to be annotated with the @objc() attribute:
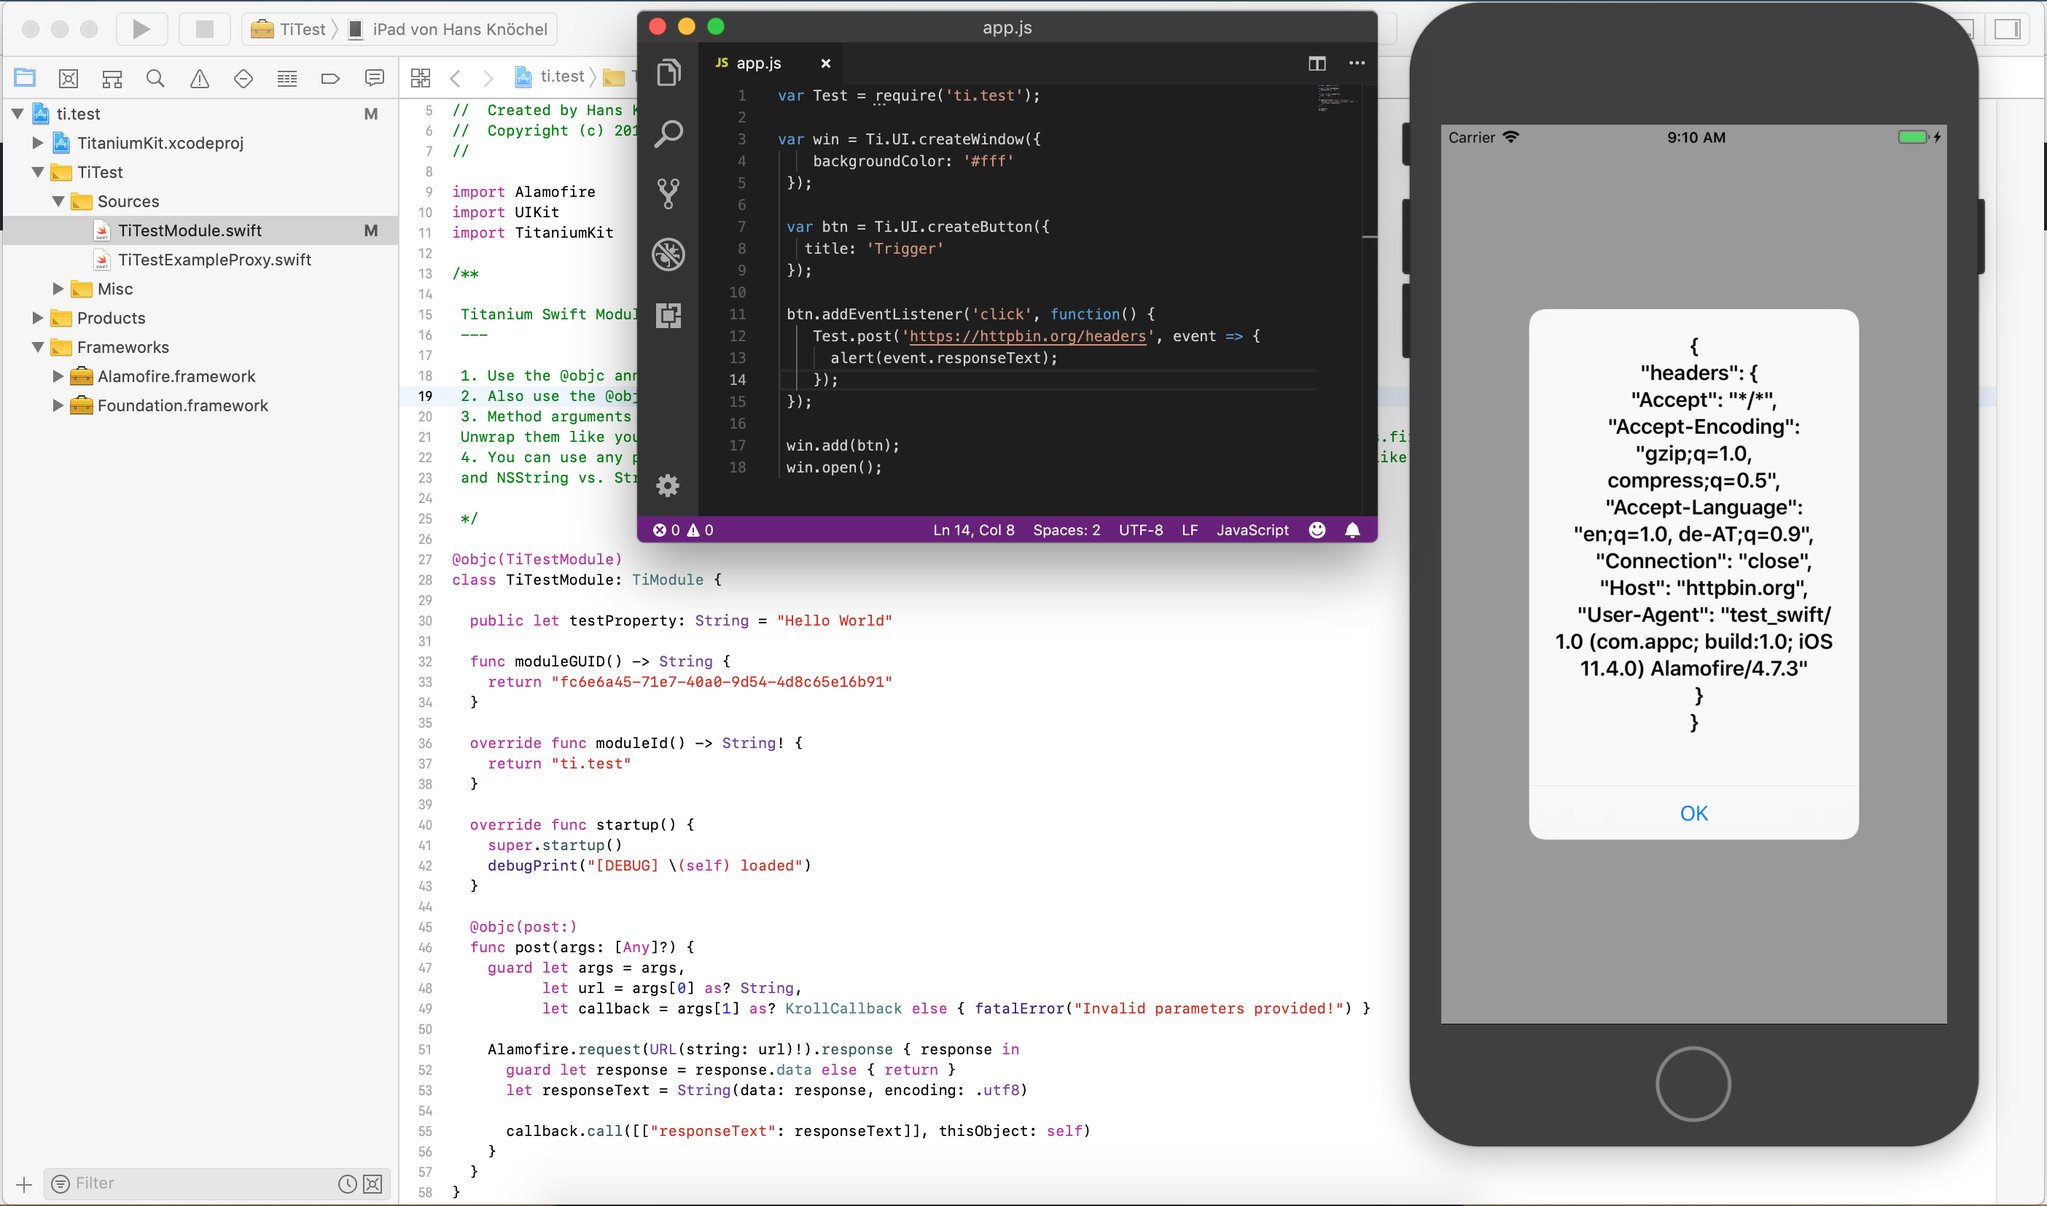
TiTestModule.swift
@objc(post:)
func post(args: [Any]?) {
    guard let args = args,
          let url = args.first as? String,
          let callback = args[1] as? KrollCallback else { fatalError("Invalid parameters provided!") }

    // Use the "url" and "callback" properties
}
In the above example, we are writing a method named "post()" that can be accessed from the module (assuming it is called "ti.test") as the following:
index.js
import Test from 'ti.test'; // ES6+ imports!

Test.post('https://httpbin.org/headers', event => {
  // Use the event
});
As you noticed, the args parameter is an Optional and should be guarded before it's usage, since it can be nil when calling it with arguments, e.g. Test.post(). The same goes for the first and second parameter of the method, which includes the URL of the method in the first parameter and the callback (an instance of the KrollCallback class) as the second parameter. Once ready, you can pass the arguments to your native API's and return to your proxy (if necessary).
# Type Conversion
Just like between Objective-C and JavaScript, common types are converted automatically for you:
| JavaScript | Swift | Objective-C |
|---|---|---|
| String | String | NSString |
| Object | Dictionary | NSDictionary |
| Array | Array | NSArray |
| Date | Date | NSDate |
| Function | KrollCallback | KrollCallback |
| Number | Number | NSNumber |
| null | nil | nil / NSNull |
As you may noticed, the difference between types in Swift and JavaScript is pretty small, improving the readability of your native for larger-scaled module projects as well.
# What's next?
Well, you learned how to create native Swift-based modules. Once your module is ready, you can package it (ti build -p ios --build-only) and deploy it to GitHub or Gitt.io (opens new window). If you have further questions, make sure to visit our TiSlack (opens new window) community or reach out to us via GitHub Issues (opens new window). Code strong!